Filters and Grouping
Filter Basics
You can find the filter bar on the top of most CloudGuard pages.
- Login to your Infinity Portal
- To open the filter selection, click Add Filter and select a filter object. A secondary list is shown with filter options for the selected object
- Select the filter options for the object
You can change (or remove) a selected filter option. Open the list of options for a filter object and alter or add to the options chosen.
You can save a filter to use it again or make it available to other users.
- Select the filter in the filter block
- Click Saved Filters, and the window shows all existing public and private filters
- In the Save Filter section, enter a name for the new filter
- Select Public to share this filter with other CloudGuard users
- Click Save
Group Arrangement
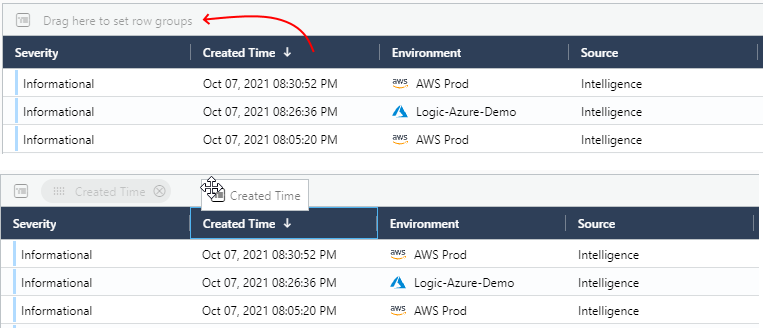
When presented with table data, a grouping area exists at the top so you can set up findings with the same parameters together, so they appear in the table under the same group title.
Arrange the findings by:
- Severity, Created Time, Environment, Source, and so on
- Drag and drop the related column header into the grouping bar to group the findings.
Updated 3 months ago